
The steps below outline the steps required to install the Save To DynaFile Headless Service which will securely upload files from your local network (typically created by scans from a multi-function copier) into the DynaFile system.
Minimum Installation Requirements:
- Shared or dedicated server, either physical or virtual
- Windows server 2016 or greater
- 1 GB of disk space
- 1 GB of RAM
- Single 1.5+ GHz CPU
- .NET Framework 4.7+
Pre-Installation Steps:
- Create a folder on a server (preferably on the same server that the service will be installed on) as the parent folder for the scanned files (e.g. D:\DynaFile).
- Share this folder on the server, preferably with the name of “DynaFile” and assign the proper NTFS and share permissions so that the copy/scanning device can write to this share. A dedicated domain account for this share, which is only used by the copier to save scanned files to this share, is preferred.
- Create sub-folders in this folder named for the destination state in DynaFile, typically these include items like “Denver MFC”, “Barcode Processing” or “Pending for Payroll”.
- Please reach out to your DynaFile account manager or [email protected] if you don’t know the folder name / destination.
- Create a new scan destination on the multi-function copier or other scanning device named “DynaFile [your destination] that saves files to the corresponding share
- For Example: a scan destination named “DynaFile Barcode” would map to someplace like \\myserver\dynafile\barcode and scan destination named “DynaFile Payroll” would map to someplace like \\myserver\dynafile\Payroll
- You will need to provide the proper domain credentials (referenced in step #2) in order for the copier to save to the share.
- Set the scan destination to scan in a black & white, multi-page TIFF format at 300 dpi. If the copier is unable to specify the format on a per-destination basis, then ensure that the users are instructed on how to change the format manually per-scan.
- If TIFF format is unavailable, then PDF format is acceptable, but not preferred.
- Make absolutely certain that color scans are not the default scanning method as they will create overly large files in DynaFile. Even if the copier shows “Grayscale”, that is NOT “Black & White”. You need to ensure the copier is scanning only in B&W unless there is specific needs to create larger color scans.
- Repeat steps #4 and #5 for all scan destinations for that copier
- Request the Token and Secret from your DynaFile account manager or [email protected]
- The token and secret will be sent to you directly in a link that can only be accessed once; please store them securely.
Service Installation:
- Open and save the provided Token and Secret (if you do not have the required keys, please reach out to your DynaFile account manager or [email protected])
- Use the link below to download install the Save to DynaFile Headless Service
- Once installed, open the Save To DynaFile Headless Configuration (a shortcut should have been placed on the user’s desktop that installed it) and review the Service Management Tab
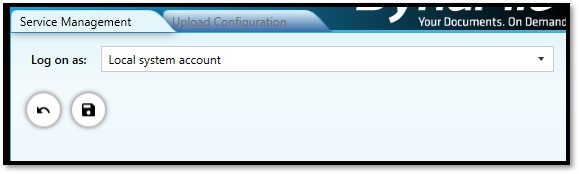
- Click the gear icon
- If the share and the service are on the same server, then leave the “Local system account” selected
- If, however, the share is on a separate server, you will need to specify the appropriate network or user account credentials.
- When complete, click on the save icon.
- Click the gear icon
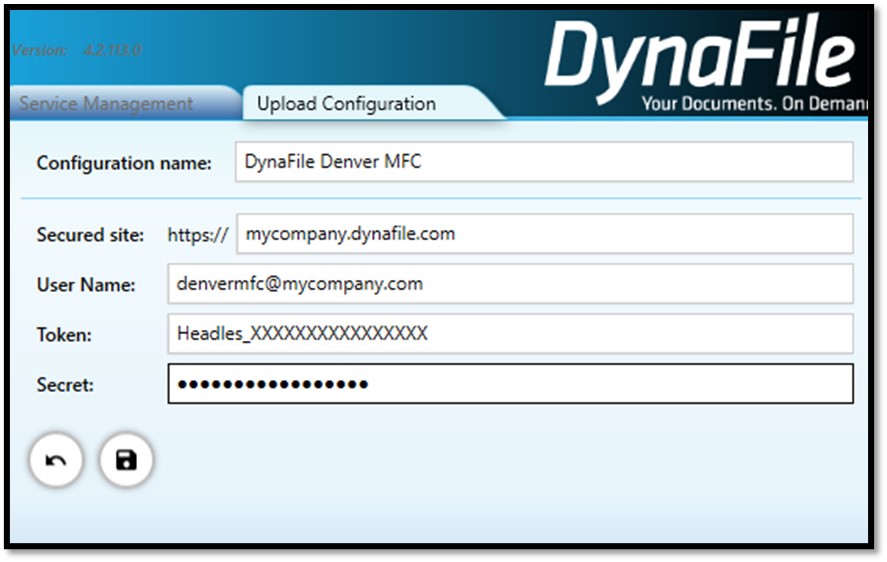
- Next click on the “Upload Configuration” tab and click the “+” icon to add the configuration.
- Using the information provided in the Token and Secret text document fill in the fields for: Configuration Name, Secured Site, Username, Token and Secret
- Click the Save icon
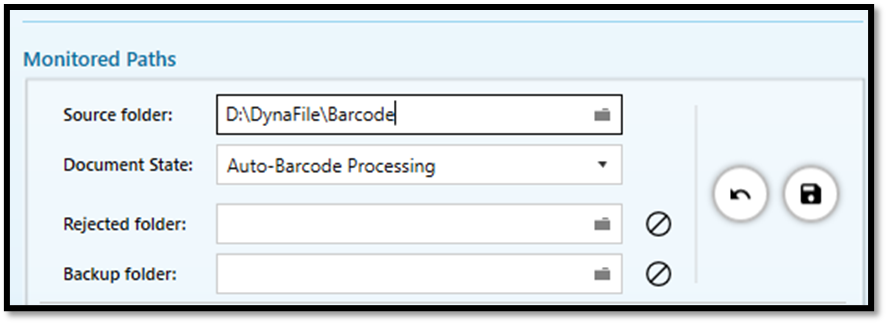
- Once the keys are saved, click the little “+” icon directly below “Monitored Paths” and select the first Source Folder you created during the pre-installation set up (this is the folder that is MFC is configured to scan to), next select the Document State from the dropdown (this is where the documents will be sent within DynaFile). Click the Save icon (you should ignore the Rejected and Backup Folders as those are used only for troubleshooting purposes).
Repeat step 5 for each Source Folder created.
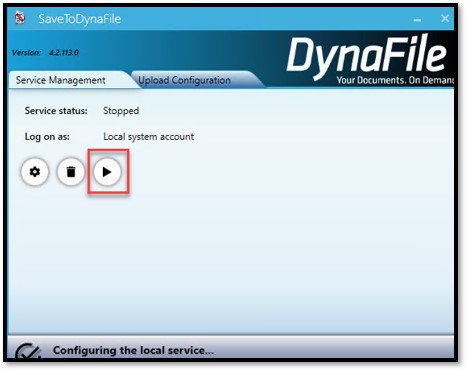
- Once the Paths are saved > click back onto the Service Management Tab and select the Start/Play Icon
- You can now safely close the configuration utility and the service will run automatically, even after system reboots.
Should you experience any issues with the service, navigate to “C:\ProgramData\Blue Ribbon Technologies\SaveToDynaFile Service\Logs\” and ZIP up and send the log files to your DynaFile support representative for further review.